-
The Yamaha R3 is the longest running STG Project Bike to date. Our initial plan was to complete the build and sell the bike in the summer of 2017. This all changed when 11 year old Max Van did his first track day on the STG R3 at Grattan Raceway in August of 2017 with Sportbike Track Time. Let's just say the apple did not fall far from the tree, Max was hooked by the end of his first session! Once we got back to the shop it was time to start converting the STG R3 from a street bike to a fully prepped track bike.
Looking back on the project the last install video we shot before deciding to put Max on the bike was from May of 2016. From the end of July 2017 we have shot 21 new install videos covering the transformation of the STG Yamaha R3 from a street bike to a fully prepped race bike. Mini Van earned his Wera Race License in June of 2018 and his goal is to grid up at Grattan with Wera on the R3 in 2019 so stay tuned...
-
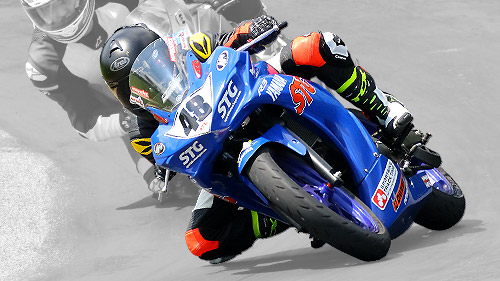

Barber Motorsports Park on the STG R3
-
-
Here are a couple of hot laps from Max's first time at Barber on the Yamaha R3 with Sportbike Track Time. Barber is one of our favorite tracks to ride, if you have not been there you need to change that ASAP! The layout here really suits a lightweight bike like the R3 with it's flowing design and short straights.
Max Van's First Crash on The STG Yamaha R3 Project Bike
-
End of the day there are two types of riders; those who have crashed, and the ones who are going to crash. Well it may have taken Max a while to make it into the group of riders who have crashed but he is part of the club now. After posting the video of the crash on our YouTube Channel we had several requests to review the post crash damage on the R3 so we shot this quick video. The crash was a low side in turn 5 (man that turn has collected a ton of riders over the years) at Barber Motorsports Park during the Summer of 2018.
-
2015-2018 Yamaha R3 M4 Street Slayer Carbon Slip On Exhaust Install
-
-
The M4 Yamaha R3 Street Slayer Carbon Slip On Exhuast eliminates the catalytic converter which improves both the sound and the performance of the YZF-R3. The canister is a carbon fiber shorty that really cleans up the look of the Yamaha. Strong power gains and an 11.5 lbs. weight loss are included at no additional charge. Watch as Van goes into more detail on how to install the Street Slayer Carbon Slip On Exhaust from M4. We ran the R3 with this system on it for an extended period of time before installing a fuel controller and were happy with the performance. In our opinion installing a fuel controller with this system is optional. If you want to get the maximum benefit and performance add a fuel controller, if you are happy with how the bike performs after the install just keep on riding.
This M4 Exhaust System has been our best selling for the 15-18 Yamaha R3 since it was introduced.
2015-2018 Yamaha R3 Akrapovic Stainless Steel Slip On Exhaust Install
-
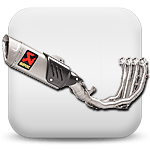
I just picked up the 2015 YZF-R3, rode it back to the shop and noticed how quiet the stock exhaust is on it. For the first install, we decided to go with the Akrapovic Yamaha R3 slip-on exhaust as it is a simple installation and is extremely affordable. The Akrapovic is much smaller than the stock system, which looks a million times better and saves us some overall weight. This does not remove the muffler box so it doesn't make it a whole lot louder, but gives it enough for a good exhaust note and sound. With this slip on there is no need to add on a fuel controller.
The exhaust comes with full installation instructions and everything you will need to complete the project. This is simple as it bolts directly in place of the stock system and only takes a few minutes to complete. As always with installing a new exhaust, you want to make sure you clean it well before starting it.
-
2015-2018 Yamaha R3 Yoshimura Race R-77 Full Exhaust System Install
-
-
The Yoshimura Yamaha R3 Race R-77 Full Exhaust System replaces the entire exhaust system and eliminates the OEM catalytic converter. Installing this full system will increase the power (we noticed it on the very first ride), improve the sound and reduce the weight. The fit and finish of the Yosh Exhaust is excellent, tons of value with their brand. This project is realaively easy for a full system install, most riders with reasonable mechanical skill should be able to get a solid end result. To get the maximum benefit from this full system you will need to install a fuel controller. That said we have put more miles on the STG R3 without a fuel controller and were happy with the performance of the bike so we suggest riding the bike to see if you feel the need to add a fuel controller before doing so.
2015-2018 Yamaha R3 M4 Full Exhaust System Install
-
The M4 Yamaha R3 Full Exhaust System is one of the most popular full systems for the R3. This system weighs 11.5 lbs less than the OEM system while producing 10% more power than stock. The M4 R3 Full System has a reputation for producing the best power gains which is why you see this one on so many Yamaha R3's. We have not had the R3 on the dyno but have seen the highest top speeds (using a GPS timer) by almost 2 mph with this pipe on the bike. M4 includes a race mount bracket and quiet insert with this system. On the dyno having the quiet insert installed produces the most power so it should be left in.
As with any full system to maximize your performance you will need to install a fuel controller. We rode our STG R3 for 1,500 miles with a full system on the bike before we installed a Power Commander and had zero issues. That said you do not have to install a fuel controller in order to run the exhaust if you choose not to or need to wait a bit before doing so.
-
2015-2018 Yamaha R3 Hindle EVO Megaphone Full Exhaust System Install
-
-
The Hindle Yamaha R3 EVO Megaphone Full Exhaust System is the most affordable full system we offer for the R3 selling for just over $400. This system replaces the entire exhaust system from the motor to the tail and eliminates the catalytic converter. Installing this on your R3 will increase the power (yes you will notice the difference on the butt dyno) and drops over 12 lbs of weight. Max did his first track day on the R3 after we installed the Hindle pipe and he was stoked with the way it looked and sounded. This system does not include a noise insert, Hindle has one available which is sold separately.
We did not install a fuel controller on the STG R3 with this system and were happy with the performance. That said if you want to get the maximum benefit from the full system you will need to install a fuel controller of have the OEM ecu mapped at some point. We also suggest installing a block off plate to eliminate the PAIR system when you do a full exhaust.
2015-2018 Yamaha R3 Graves Full Exhaust System Install
-
Graves Motorsports and Yamaha go together like race slicks and tire warmers. If you have watched any of the MotoAmerica Junior Cup races odds are you have seen how successful the Graves R3 Program has been. The Graves Yamaha R3 Full Exhaust System is the same system found on all of their Junior Cup Bikes. Graves Exhaust offers that premium level of fit and build quality, one of the best we offer. This system fits like a glove and installs with ease. Installing this on your R3 will increase the power and shave 6 lbs of weight from the bike. Comparing this to other full systems you will notice the canister is a little longer. With testing Graves has found the R3 makes more power with a full length canister that has a noise insert installed (this system comes with an insert). This system ships with a race mount bracket which allows you to eliminate the OEM passenger pegs.
As with any full system to maximize your performance you will need to install a fuel controller. We rode our STG R3 for 1,500 miles with a full system on the bike before we installed a Power Commander and had zero issues. That said you do not have to install a fuel controller in order to run the exhaust if you choose not to or need to wait a bit before doing so.
-
2015-2018 Yamaha R3 Leo Vince LV-10 Slip-On Exhaust Install
-
-
The Leo Vince 2015-2018 Yamaha R3 LV-10 Slip-On Exhaust is one of the most affordable slip ons we offer for the R3 with pricing that starts at $199.95. This is a very easy install on the R3, most riders can get this done in well under an hour. Replacing the OEM muffler with the Leo Vince LV-10 will reduce the weight by approximately 4 lbs while making the R3 sound a whole lot better. Our first experience with the Leo LV-10 Slip On was early in 2018 when we installed one on our 2018 Kawasaki Ninja 400 STG Project Bike so we were excited when this slip on became available for the R3. The quality of this slip on is very impressive especially when you consider it sells for under $200.
Installing the Leo Vince LV-10 Slip On Exhaust on your Yamaha R3 does not require removal of the catalytic converter so your emissions system remains functional. A fuel controller is not necessary after installing this slip on.
2015-2018 Yamaha R3 Woodcraft Rearsets Install
-
-
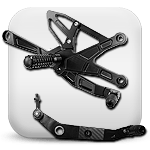
From the factory the ergonomics of the R3 are roomy and comfortable. This gives a new rider a lot of confidence and helps you expand your riding skill set. Once you start to corner low it won't take long before you run out of ground clearance. The Woodcraft Yamaha R3 Rearsets will get you the ground clearance you need while putting you in a better position for performance riding. Woodcraft worked hard on this kit to make sure it would perform on the race track as well as the street. With it's large range of adjustment you can go from the OEM position to 2" up and 1 1/2" back to best suit your style. For the street riders out there this kit allows for the use of the OEM rear brake light switch which is a nice touch.
Wooodcraft is a brand we are proud to offer here at STG. We rode the R3 after installing this rearset kit on the street as well as the track and were happy with the riding position and smoothness of the controls.
2015-2018 Yamaha R3 Driven Rearset Relocation Brackets Install
-
The Yamaha R3 is one of the best all time affordable sportbikes. The Driven Yamaha R3 Rearset Relocation Brackets are a great way to get the ground clearance you need to corner low without having to invest in a full set of rearsets. This is a simple, straight forward install most riders can complete. It is important to note that anytime you are modifying the controls of you bike you get a good result. If you watch this video and do not feel comfortable doing this install on your R3 we recommend taking the bike to a licensed motorcycle technician.
-
2015-2018 Yamaha R3 Vortex V3 2.0 Rearsets Install
-
-
The Vortex Yamaha R3 V3 2.0 Rearsets feature an innovative new design from Vortex Racing that offers a total of 32 footpeg positions to choose from with full adjustable toe pieces on both pedals. This kit allows for either standard or GP shift patterns, no additional parts required. On the brake side the OEM rear brake light switch and return spring can be installed. This is a feature we really like to see on a rearset kit.
We have ridden the STG R3 on the track with these rearsets and really like their performance. In July of 2018 Max Van crash tested these at Barber Motorsports Park in turn five. The crash damage to the shift side rearset was repairable at the track so he could finish his day. Considering it was Max's first fall we installed a new footpeg and toe piece to make the bike feel as it did pre crash. That said we could have made a couple minor adjustments and left the shortened peg on the bike if we did not have spare parts available.
2015-2018 Yamaha R3 Vortex V3 2.0 Rearsets Crash Damage Review
-
Starting in 2016 Vortex Racing introduced a new design for their rearset kits that offers an amazing amount of adjust-ability. Max Van managed to crash test the Vortex V3 2.0 Rearsets during a lowside crash in turn five at Barber Motorsports Park in the Summer of 2018 so we decided to shoot a quick video showing the damage and what it took to repair the rearsets. At the track we took the footpeg and toe piece from our 2018 Suzuki GSXR 1000R STG Project Bike to fix the rearsets, restoring them pretty close to their pre-crash condition. If we did not have any spare parts available we could have easily made the bike track ready again by simply straightening a couple parts. Overall we were pleased with how they held up in the crash, watch this video for more details.
-
2015-2018 Yamaha R3 Attack Performance Rearsets Install
-
-
The Attack Performance 2015-2018 Yamaha R3 Rearsets are a fully adjustable, precision machined piece of racing kit. With this kit you can use either Standard or GP Shift, no additional parts required. A longer rear brake line is required to complete the installation, we have a Spielger Line available (sold separately) in multiple colors. When we installed these on our STG R3 we had previously installed a Dynojet Quickshifter and were able to use the shift rod set up we had in place without making any changes. The grip of the footpegs and the tight tolerance of the bearings on the pedals are a couple of our favorite features.
Attack Performance develops their products with race track use as the first priority. That said you can run these rearsets on the street as well as the track without any issue.
2015-2018 Yamaha R3 Hotbodies Racing Rearsets Install
-
The Driven Yamaha R3 Hotbodies Racing Rearsets are available in black with red accents or gold with red accents. This kit will accept the OEM rear brake light switch to keep your rear brake light working for street riders. Choose from standard or reverse shift pattern to suit your riding style without having to purchase additional parts. This is the most affordable rearset kit we offer for the Yamaha R3.
-
2015-2018 Yamaha R3 Driven Chain and Sprocket Kit Install
-
-
One of the best ways to customize the performance of your motorcycle is to change the gearing. From the factory the gearing on the Yamaha R3 is pretty short which is the opposite of what we normally see with a sportbike. With the R3 we typically suggest going up one tooth on the front or in the rear if you prefer a smaller change from stock. The Driven Yamaha R3 Chain and Sprocket Kit offers you the ability to select not only the gearing you feel will best suit your riding style, but chain and rear sprocket colors too.
If you are interested in installing you own chain and sprocket kit we have some excellent resources to help guide you through the whole process with our STG 520 Chain and Sprocket Kit Guide. This will take you from selecting the gearing all the way to getting that rivet link installed properly.
2015-2018 Yamaha R3 Healtech SpeedoHealer Install
-
Speedometer and odometer inaccuracy is a common problem on most motorcycles and the Yamaha R3 is on that list. If you have changed the gearing on your R3 and want to correct the speedo the HealTech Yamaha R3 SpeedoHealer V4 is a simple, inexpensive way to get that done. The SpeedoHealer can be calibrated to correct for the gearing change or general inaccuracy by following the steps we show in this install video. It is important to note that the install procedure we show in this video is for the NON ABS Yamaha R3. If you have an ABS equipped R3 and would like to install a SpeedoHealer the process will look very different from the one shown in this video.
-
2015-2018 Yamaha R3 Woodcraft Toe Guard Install
-
-
If you are racing or track riding your Yamaha R3 (or any other bike for that matter) we highly recommend installing a toe guard. A toe guard mounts to the bottom of the swingarm just before the rear sprocket and is designed to prevent your foot (or any appendage) from making it's way in between the chain and rear sprocket in a crash or near crash. The Woodcraft Wide Coverage Toe Guard Kit comes with the hardware necessary to complete the install and is a project most riders with reasonable mechanical skill can handle. Installing this on your bike requires drilling holes in the bottom of your swingarm and using Jack Nuts to secure the mounting bracket. In this video we show all the steps it takes to complete this project.
2015-2018 Yamaha R3 Chain Adjuster Mod
-
The stock chain adjusters on the Yamaha R3 can make changing the rear wheel are serious pain in the ass. This is not really an issue if you are only riding your R3 on the street as you won't need to remove the rear wheel as often as a rider who has converted theirs to a track only bike. Once Max started riding the bike on the track more Van decided it was time to address this problem and found a way to do so without spending any money. In this video we will show you how we modified the chain adjusters on the STG R3 to prevent them from falling out during rear tire changes. We did this at the end of July in 2018 and are happy to report it has perfromed as we hoped it would.
-
2015-2018 Yamaha R3 Graves Fender Eliminator Install
-
-
The stock rear fender on the new R3 is the first thing that needed to go. Van installed a Graves 2015-2018 Yamaha R3 Fender Eliminator in it's place. Graves does a great job across the board but when it comes to their Yamaha Parts they knock it out of the park. The fender eliminator is a perfect example of just that. Our install reused the stock rear turn signals and delivered a clean, race ready look as expected.
This fender eliminator kit took a little more engineering than most do to produce a finished product worthy of being installed on the R3. The kit includes a full set of instructions with pictures to help with the install and ensure you get a good clean result. Graves covered all the bases with this one and I would recommend it for sure.
2015-2018 Yamaha R3 Driven Mirror Eliminators Install
-
The Driven 2015-2018 Yamaha R3 Mirror Eliminators replace the OEM mirrors to get your R3 a cleaner, supersport style look. If you are riding on the street a set of bar end mirrors should be installed after removing the OEM mirrors. We have several solid options available from Driven Racing as well as CRG. Now that the STG Yamaha R3 is in full race trim we still have the mirror eliminators installed with the race bodywork. A little bling never hurts whether you are on the street or the race track!
-
2015-2018 Yamaha R3 Driven Halo Gas Cap Install
-
-
A keyless gas cap is a must have mod for any track bike that many street riders will do as well. The Driven 2015-2018 Yamaha R3 Halo Gas Cap consists of a model specific base and cap that is available in several colors to accent your bike. The base and the cap are sold separately so make sure you pick up both at the same time. We have run the Driven Fuel Cap on several of our STG Project Bikes over the years and have always been happy with the fit, finish and quality. If you like to add accent colors to your bike the Driven Halo Gas Cap is a great option.
2015-2018 Yamaha R3 Motoholders Fairing Stay Install
-
If you are converting your Yamaha R3 to a track only bike replacing the OEM steel upper faring stay with the Motoholders 2015-2018 Yamaha R3 Fairing Stay will drop 1.05 lbs of weight up top for under $200. Installation of this is pretty straight forward and it fits very well. If you are interested in installing this on your R3 we cover all of the steps in this video. It is important to note that this is intended to be used with race bodywork and no mirrors mounted up to the stay.
-
2015-2018 Yamaha R3 Hotbodies Colorform Race Bodywork Install
-
-
Like most bikes installing race bodywork on the Yamaha R3 requires both time and patience if you want to get a good end result. The R3 uses plastic trim panels the span from the bottom of the fuel tank to the riders seat that intersect with the race upper. Getting the race bodywork prepped to receive these panels can be a little tricky. In this video we show step by step what it takes to fit the Hotbodies 2015-2018 Yamaha R3 Race Bodywork Kit and get a solid end result. We have run this on the STG Yamaha R3 for over 1 year and have been very happy with this kit. Max crashed once on this bodywork and it held up good enough we were able to continue running it without making repairs.
2015-2018 Yamaha R3 Driven Halo Stainless Steel Bar End Mirror Install
-
If you want to remove the OEM mirrors to clean up the front end of your Yamaha R3 bar end mirrors are a must have. The Driven Halo Stainless Steel Bar End Mirror install easily on most any sportbike and offer a to of adjustability. Before we converted the STG R3 to a track only bike we had the opportunity to ride with the Halo Bar End Mirror on the bike and felt they were stable while offering good visibility. The Driven Halo Bar End Mirror is available in 5 colors with fitment for the right or the left side of the bike.
-
2015-2018 Yamaha R3 Vortex V3 2.0 Frame Sliders Install
-
-
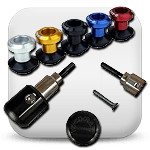
The R3 is one of the most popular options for first time riders. That said odds are if you are just learning to ride shit will happen and your precious R3 may wind up on the ground at some point. Installing a set of frame sliders is a great way to help minimize the damage to the expensive OEM fairings if this happens. The Vortex 2015-2018 Yamaha R3 V3 2.0 Frame Sliders install without having to cut holes in your fairings and can help protect your bike if said shit happens to you.
In this video we show all the steps it takes to get these installed if you are interested in tackling the project yourself. This frame slider kit is best suited for bikes ridden on the street, if you are looking for a set of frame sliders for a bike ridden on the race track we suggest a more low profile design.
2015-2018 Yamaha R3 Woodcraft Engine Stator Cover Protector Install
-
-
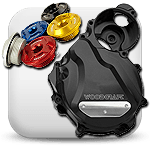
The Woodcraft 2015-2018 Yamaha R3 Engine Stator Cover Protector is a machined billet aluminum cover protector that bolts right over the OEM stator cover on the Yamaha R3. Installing this cover protector can be the difference between finishing your day on the bike or sitting on the sideline with an oil leak. This cover features a replaceable puck that is available in multiple colors to accent your bike and can be replaced after a crash if the cover itself is still in good shape.
Woodcraft also offer a clutch cover protector for the Yamaha R3 to get you the protection you need for both sides of the bike.
2015-2018 Yamaha R3 First Service
-
In this video we run through simple maintenance that needs to be performed on the Yamaha R3 after the first 500 miles or so have been put on the bike. This is a pretty simple process that most riders can manage and it is a great way to learn more about your bike. Working on your own bike is a huge part of the hobby, so much so there are many riders who enjoy the service work as much or more than the riding.
-
2015-2018 Yamaha R3 Driven Block Off Plate Install
-
-
If you are planning on installing a full exhaust system on your Yamaha R3 we recommend eliminating the air injection system at the same time. Once you have modified the emissions by removing the catalytic converter the AIS will create some minor performance issues. Installing the Driven 2015-2018 Yamaha R3 Block Off Plate allows you to remove the AIS valve and all associated plumbing. This will reduce the weight a little and clean up the area between the engine and fuel tank.
This part is designed for closed course operation only as it disables the emissions system.
2015-2018 Yamaha R3 GB Racing Engine Cover Protector Set Install
-
Whether you are riding at the track or on the street engine cover protection is worth the investment. Installing the GB Racing 2015-2018 Yamaha R3 Engine Cover Protector Set is a great option if you are building a track bike as this can be the difference between finishing your day or sitting on the sidelines with an oil leak. The GB Racing Cover Kit for the R3 includes protectors for the clutch cover, water pump cover and the stator cover. Max has crash tested this kit in Turn 5 at Barber Motorsports Park and they performed as expected.
In this video we show all the steps it takes to complete this project yourself. This is a pretty straight forward job and the kit comes with an excellent set of instructions. As always if you do not feel comfortable tackling this project on your own we recommend taking the bike to a licensed motorcycle technician.
-
How To Change The Engine Coolant on a 2015-2018 Yamaha R3
-
-
Engine coolant is something that should be changed every couple years whether you ride on the street or the track. If you ride on the track you should replace the glycol based coolant with coolant that is approved for use on the track by the org you plan to ride with. We use Engine Ice Hi-Performance Coolant on all of our STG Project Bikes. Engine Ice is suitable for track and street bikes, offering lubricating properties and freeze protection.
In this video we show the steps required to flush your cooling system and replace your coolant successfully. While this video focuses on the steps for the 2015-2018 Yamaha R3 you can use this as a guide for other bikes as well. Bleeding air out of the system is the single most important step in the process and we cover this in depth here.
2015-2018 Yamaha R3 Spiegler Brake Line Kit Install
-
-
The best bang for the buck performance mod is replacing the OEM rubber brake lines with a set of stainless steel braided brake lines. This will transform the brakes on your R3 giving you more power and feel. The Spiegler 2015-2018 Yamaha R3 Brake Line Kit are made in the USA and available in endless color combinations to accent your bike. We have used Spiegler Brake Lines on every STG Project Bike to date as well as every personal bike we have owned.
In this video we show step by step what it takes to install Spiegler Brake Lines on your Yamaha R3. If you do not feel comfortable doing this project yourself we recommend taking the bike to a licensed motorcycle technician.
2015-2018 Yamaha R3 Galfer Front Brake Wave Rotor Install
-
The Galfer 2015-2018 Yamaha R3 Front Brake Wave Rotor is made from a proprietary mix of virgin high carbon 420 stainless steel, laser cut (never stamped), double disc-parallel ground to assure perfect parallel flatness and heat treated to each specific application. KBA and TUV approved.
Depending on application, designed for street, track and off road, this rotor is for the rider that wants more than what the stock brake system can provide. Longer-lasting, extremely predictable and consistent with a drastic increase in lever feel, modulation and brake torque.
-
2015-2018 Yamaha R3 Galfer Rear Brake Wave Rotor Install
-
-
The Galfer 2015-2018 Yamaha R3 Rear Brake Wave Rotor is made from a proprietary mix of virgin high carbon 420 stainless steel, laser cut (never stamped), double disc-parallel ground to assure perfect parallel flatness and heat treated to each specific application. KBA and TUV approved.
Depending on application, designed for street, track and off road, this rotor is for the rider that wants more than what the stock brake system can provide. Longer-lasting, extremely predictable and consistent with a drastic increase in lever feel, modulation and brake torque.
2015-2018 Yamaha R3 K-Tech Razor-RR Rear Shock Install
-
-
The stock rear shock on the R3 really needs to be replaced when you get serious about turning fast laps at the track. The K-Tech 2015-2018 Yamaha R3 Razor-RR Rear Shock is designed for track day/race use, the Razor-RR has optimized internals / spring / length settings to enhance performance for track orientated use. Replacing the rear shock on the R3 is a relatively easy process, most riders should be able to handle this project. Important to note you will need to be able to support the bike on both sides using the rearsets or another fixed mount.
Over the years we have used Ohlins on all of our STG Project Bikes. We have heard some good things about K-Tech so we decided to give it a go on our R3. After riding it most of the 2018 season with this set up we can confirm all the good things we have heard are true.
2015-2018 Yamaha R3 K-Tech 20IDS Fork Cartridge Kit Install
-
The stock suspension on the R3 works good on the street but shows it's limits on the track quickly, especially once you make into the advanced group. The K-Tech 2015-2018 Yamaha R3 20IDS Fork Cartridge Kit replaces the OEM fork cartridge with a proper race level kit. This installation requires modifying the OEM inner fork tube to remove the hydraulic stop to allow for clearance needed to fit the K-Tech Cartridge. In this video we show all of the steps it takes to complete this install. If you do not feel comfortable doing these yourself we recommend removing the forks and sending them off to a K-Tech Technician for installation (should cost about $250).
Max has ridden the STG R3 on the track several times since we installed the K-Tech Suspension both front and rear and was able to feel the difference straight away. In 2019 Max will do his first races with Wera using this set up.
-
2015-2018 Yamaha R3 Graves Steering Damper Kit Install
-
-
Most racing organizations require a steering damper to be installed in order to pass tech. The Graves 2015-2018 Yamaha R3 Steering Damper Mount is designed to be used with the Ohlins SD 001 68mm Universal Steering Damper which is sold separately and required to complete the install. Installation of this kit will require modification or replacement of the upper faring stay. We had a Motoholders 2015-2018 Yamaha R3 Fairing Stay on our R3 when we installed this kit that we modify in this video to complete the install. The OEM upper stay can also be modified in a similar manner if you want to run it. This kit also includes the Graves Yamaha R3 Steering Stop Kit which is required to install this damper kit. It reduced the sweep of the bars to prevent the damper from being bottomed out.
2015-2018 Yamaha R3 Driven Captive Wheel Spacers Install
-
If you have removed and reinstalled the wheels on your Yamaha R3 odds are you already know this is a real pain in the ass when the bike is in stock trim. The Driven 2015-2018 Yamaha R3 Captive Wheel Spacers help to make this process a little easier by preventing the wheel spacers from falling out as you reinstall the wheels. We have installed these on most of our STG Project Bikes and can say they do make a difference. If you have converted your R3 to a track only bike we suggest taking a look at the chain adjuster mod video we have on this page and consider doing this and installing the Driven Captive Wheel Spacers on your R3 to get maximum benefit.
-
2015-2018 Yamaha R3 Front Fork Removal and Installation
-
-
In this video we cover the process we use to remove and reinstall the front forks on our STG Yamaha R3 Project Bike.
2015-2018 Yamaha R3 Woodcraft Clip-Ons Install
-
-
In stock trim the Yamaha R3 is very comfortable to ride with it's roomy ergonomics. As your skill increases it doesn't take long to discover those comfy ergos do not work very well when you want to take the bike to the track and corner low. The Woodcraft 2015-2018 Yamaha R3 Clip-Ons were designed specifically for the R3 to get the rider into a more athletic riding position without creating bodywork clearance issues. Before we installed these on the STG R3 we did several track days with the OEM bars so we can say with confidence installing the Woodcraft R3 Clip Ons really makes a difference.
Properly installing and adjusting a set of clip ons requires a reasonable level of mechanical skill, enough time for a clean install and patience. In this video we show what it takes to complete this project from start to finish to help you do it yourself. If after watching this video you do not feel comfortable tackling this install we recommend taking the bike to a licensed motorcycle technician.
2015-2018 Yamaha R3 Motion Pro Throttle Tube Mod
-
If you would like to reduce the amount of rotation it takes to get to wide open throttle on the cheap this mod is for you. The Motion Pro Yamaha YZF-R6 06-18 Nylon Throttle Sleeve can be installed in the OEM throttle housing of your Yamaha R3 and get you a quick turn for under $10. In this video we show the steps it took to complete this project on our STG Yamaha R3.
IMPORTANT NOTE: the throttle tube we installed is not designed specifically for this model. That said if you choose to do this on your own bike we assume no liability or risk for this choice. We found this mod on one of the R3 Forums so we decided to give it a shot. There is a ton of good feedback on this mod which is why we decided to do it on our bike. Max Van has ridden the R3 on the track a couple times with this mod and he liked the quicker turn throttle.
-
2015-2018 Yamaha R3 Motion Pro Rev2 Throttle Install
-
-
If you are serious about riding your Yamaha R3 on the race track you need this in your life. The Motion Pro 2015-2018 Yamaha R3 Rev2 Throttle replaces the OEM throttle with a variable rate quick turn throttle. The kit comes complete with 5 cams allowing you to tune the throttle ratio to suit your riding style. We use the Progressive RR Cam in all of our STG Project Bikes as we feel this one is the best option for the track. This cam is progressive so the initial input of opening the throttle does not unsettle the bike. Once you begin to stand the bike up and drive off the corner it goes to wide open throttle quickly. The OEM throttle on the R3 has the throttle cables under the housing which makes for some tight clearance between the cables and the bodywork. The Motion Pro Rev2 Throttle runs the cables over the top which opens this gap leaving room for lowering the clip ons a little if you like.
The Motion Pro Enhanced Right Side Start/Stop Switch (Yamaha B) is sold separately and required to complete the Rev2 Throttle install on the R3 as the OEM throttle housing on the R3 has the start/stop switch integrated in it. This start/stop switch is a plug an play, direct fit part for the R3.
2015-2018 Yamaha R3 Dynojet Power Commander V Install
-
-
If you have installed a full exhaust system or want to upgrade to clutchless, full throttle shifting Dynojet has what you need to take your performance to the next level. We installed the Dynojet 2015-2018 Yamaha R3 Power Commander V to remap for the full system we installed and enable quick shifting for track use. This PCV comes with an O2 Optimizer to eliminate the OEM exhaust sensor and allows for both fuel and ignition control. On our R3 we used the Yoshimura Full System Map Dynojet had in their database and felt the performance was excellent.
It is important to note this is designed for closed course operation only and is not street legal. In this video we show all the steps required to install a PCV on the Yamaha R3 to help you tackle this project on your bike. If after watching this you are not comfortable installing this yourself we recommend taking your bike to a licensed motorcycle technician.
2015-2018 Yamaha R3 Dynojet Power Commander V Quick Shifter Sensor Install
-
Full throttle, clutchless upshifting will help shave some time off your lap times and keep the bike settled while upshifting. The Dynojet 2015-2018 Yamaha R3 Power Commander V Quick Shifter Sensor has been redesigned to function in both directions which is a nice upgrade over the former directional sensors. On the Yamaha R3 you will need to install both the Dynojet Power Commander V and the Power Commander V Quick Shift Sensor to enable this feature. The sensor installs in the shift rod which means you will also need to purchase the appropriate Dynojet Shift Rods to complete the installation. Ih this video we so you how to measure the shift rod you have on your rearsets to determine which Dynojet Shift Rod you will need to install the sensor on your bike.
This project requires a reasonable level of mechanical skill to get a good end result. If after watching this video you do not feel comfortable tackling this project yourself we suggest taking the R3 to a licensed motorcycle technician.
-
2015-2018 Yamaha R3 Woodcraft Keyswitch Elimination Harness Install
-
-
If you are converting your R3 to a track only bike this is a must have mod. The Woodcraft 2015-2018 Yamaha R3 Keyswitch Elimination Harness allows you to remove the OEM keyswitch from the top triple clamp and use the kill switch to turn the bike on and off. There was a time the only clean way to do this was install a kit wiring harness or create your own custom work around. This is an affordable way to get this done and make it reliable over the long haul.


